RAINBOW JUICE EXPRESS
(scroll down for english text)
Era da un bel po’ che avevo in mente questo progetto e finalmente è giunto il momento di condividerlo con voi. Devo ringraziare il mio fidanzato, che circa un mese fa mi ha regalato un oggetto che desideravo da tanto tempo: l’estrattore!
Quello che vedremo insieme è un arcobaleno di benessere.
Cinque succhi, ognuno con colori e proprietà differenti.

Sappiamo molto bene che frutta e verdura possono essere suddivise in cinque diverse categorie di colori: rosso, viola – blu, arancio, verde e bianco.
Ognuno di questi colori indica una propria serie di composti fitochimici che hanno un grande impatto sulla nostra salute.
Dunque, più naturalmente colorato sarà il nostro pasto, tanto più sarà abbondante di elementi preziosi!
Frutta e verdura di colore simile contengono benefici nutrizionali simili, ma non tutti i nutrienti riescono a sopravvivere alla cottura ed è proprio qui che entra in gioco il nostro meraviglioso estrattore.
Il vantaggio del succo è che possiamo concentrare in un solo bicchiere una quantità di frutta e verdura che a freddo e per intero non mangeremmo mai in un solo giorno.
Ormai posso definitivamente confermare che l’estrattore è nettamente superiore alla centrifuga. La differenza sta nel fatto che il primo schiaccia lentamente mentre il secondo tagliuzza più o meno velocemente, producendo di conseguenza meno succo e molto più scarto, ma non vi preoccupate, se possedete una centrifuga andrà benissimo ugualmente.
Io ho utilizzato questo: Hotpoint Ariston juicer centrifuga a freddo
Non aspettiamo oltre e sciogliamo le fila di questo arcobaleno introducendo il primo succo estratto a freddo. Giallo, dal sapore decisamente tropicale.
Questo succo ricco di vitamina A e C sarà un grande alleato del vostro metabolismo, grazie alle rinomate proprietà bruciagrassi dell’ananas e all’effetto tonico ed energizzante dell’acqua di cocco.
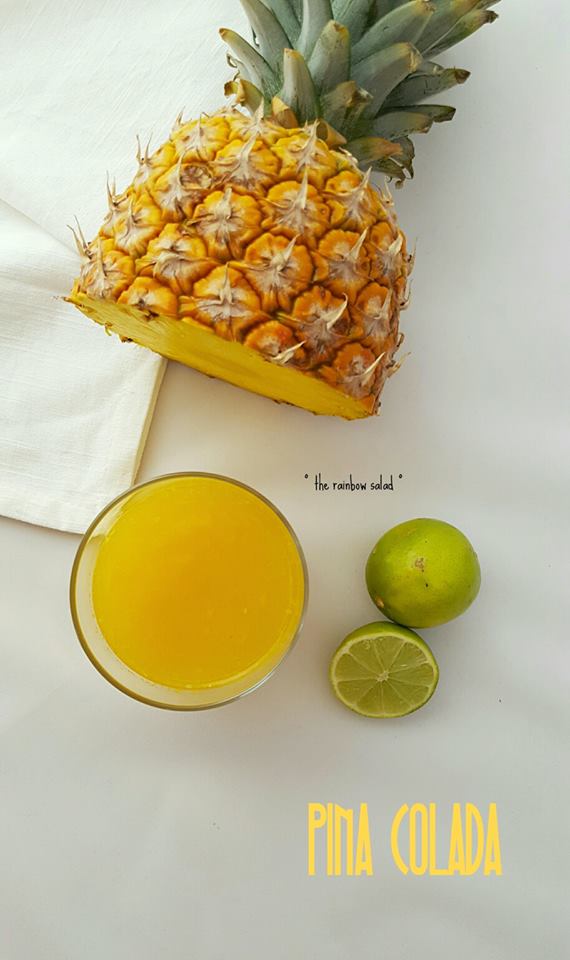
PINA COLADA🍍
Ingredienti | Per circa 400-500ml di succo
- 1/2 ananas
- 1 tazza acqua di cocco (bio, senza zucchero)
- 1-2 lime
- Q.b. cubetti di ghiaccio
Procedimento:
Private l’ananas della buccia, tagliatela grossolanamente e passatela nell’estrattore.
Spremete il lime, aggiungete l’acqua di cocco, mescolate, aggiungete ghiaccio e servite
Frutta e verdura giallo-arancio aiutano a prevenire tumori, patologie cardiovascolari e l’invecchiamento cellulare, potenziando anche la vista.
È un colore che mette di buon umore, come puoi farne a meno? 😉Anche il prossimo resta infatti sui toni caldi dell’arcobaleno, arancione!
Un succo dagli ingredienti insoliti, ma decisamente salutare, potrebbe essere il nostro elisir per affrontare questa stagione senza influenza.
Ricco di vitamine, minerali, proprietà antinfiammatorie, antimicrobiche, detossinanti e digestive.
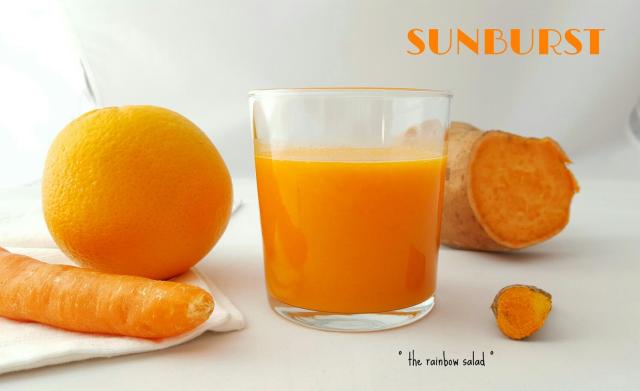
SUNBURST
Ingredienti | Per circa 400-500ml di succo
- 2 arance
- 1/2 patata dolce
- 2 carote
- 1 cm circa di radice di zenzero fresco
- 1 cm circa di radice di curcuma fresca
- 1 pizzico pepe
- Q.b. cubetti di ghiaccio
Procedimento:
Private carote, radici e patata dolce della buccia, tagliatele grossolanamente e passate tutto nell’estrattore.
Spremete le arance, aggiungete il succo appena estratto, pepe nero, ghiaccio e servite.
Il pepe nero serve ad assimilare meglio le proprietà della curcuma 
La curcuma fresca non è facile da trovare, ma si conserva bene in frigo. Si presenta come radice, molto simile allo zenzero, ma più piccola e dalla polpa arancione. Spesso la vendono al mercato, nella bancarella esotica oppure al negozio bio.
Ora è il turno del mio preferito, quello verde.
Un mix di frutta e verdura pieno di antiossidanti, minerali e vitamine.

THE GREEN POWER  🍃
🍃
Ingredienti | Per circa 400-500ml di succo
- 2 mele verdi
- 1 cetriolo
- 3-4 manciate abbondanti di spinacino fresco o spinaci
- 1 cm circa di radice di zenzero fresco
- 1 limone
- Q.b. cubetti di ghiaccio
Procedimento:
Sbucciate il cetriolo e la radice di zenzero. Tagliate grossolanamente gli ingredienti e passateli nell’estrattore, salvo il limone che andrà spremuto a parte.
Unite i succhi, aggiungete il ghiaccio ed il gioco è fatto!
Il quarto dei nostri succhi è rosso, il colore della passione.
Frutta e verdura di colore rosso si distinguono per le loro importanti proprietà antiossidanti e per la capacità di prevenire tumori e patologie cardiovascolari.
Gli alimenti rossi, inoltre, sono i più ricchi di vitamina C: favoriscono la produzione di collagene, mantengono integri i vasi sanguigni, stimolano le difese immunitarie e la cicatrizzazione delle ferite.Insomma… un elisir di bellezza!
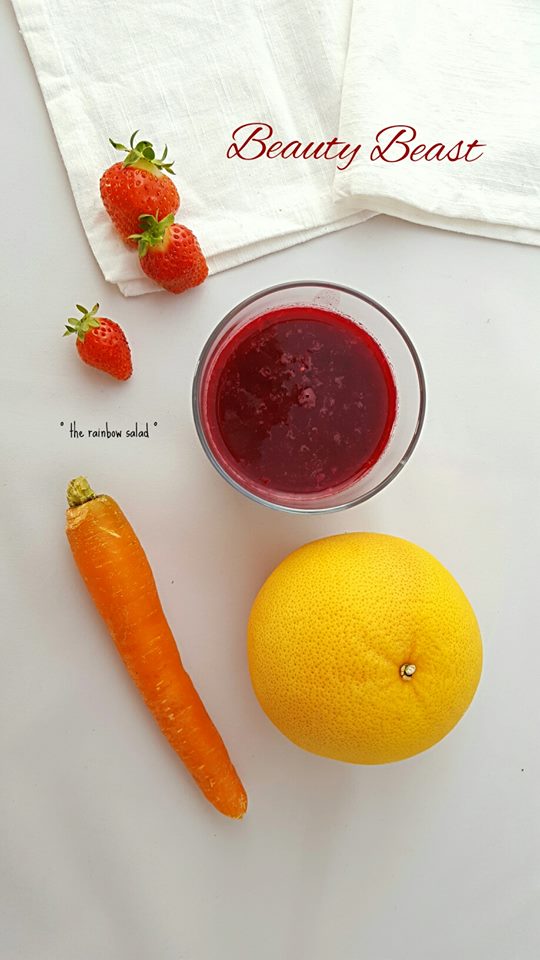
BEAUTY BEAST 💋
Ingredienti | Per circa 400-500ml di succo
- 1 tazza fragole
- 2 carote grandi
- 1 barbabietola di medie dimensioni (cruda)
- Succo di 1 pompelmo
- 1 cucchiaino succo di limone (opzionale)
- Q.b. cubetti di ghiaccio
Procedimento:
Lavate, pulite e tagliate grossolanamente gli ingredienti e passateli nell’estrattore, salvo il pompelmo che andrà spremuto a parte.
Cercate di utilizzare ingredienti biologici, le carote non andrebbero private della buccia.
Unite i succhi, aggiungete il ghiaccio e gustate il vostro elisir.
Un arcobaleno che si chiude sui toni misteriosi del viola…
Un succo un po’ ruffiano, denso e dolce, ma che ci farà risplendere da dentro.
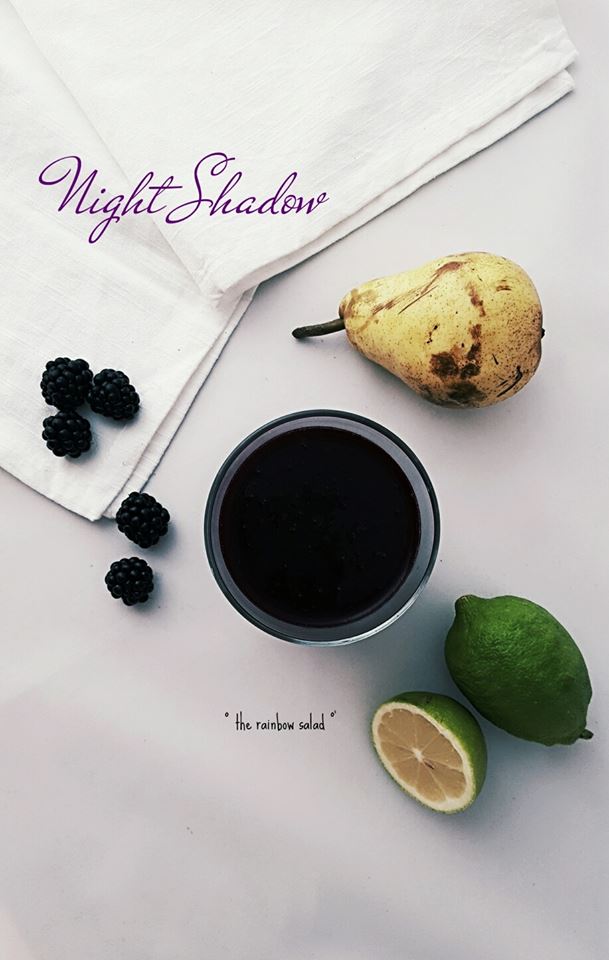
THE NIGHT SHADOW 🍇
Ingredienti | Per circa 400-500ml di succo
- 1 tazza more
- 2 pere dolci
- 1/4 barbabietola (cruda)
- Succo di 1/2 limone
- Q.b. cubetti di ghiaccio
Procedimento:
Lavate, pulite e tagliate grossolanamente gli ingredienti e passateli nell’estrattore, salvo il limone che andrà spremuto a parte. Unite i succhi, aggiungete il ghiaccio e servite.
Queste sono solo alcune tra le mille ricette possibili che possiamo ottenere combinando frutta e verdura. Spero vi siano piaciute e che diate libero sfogo alla fantasia.
Lasciate un commento se avete un estrattore o una centrifuga e fatemi sapere quali sono le vostre combinazioni di frutta e verdura preferite.
I succhi vivi di frutta e verdura rappresentano per l’organismo una vera e propria carica di energia. Le loro proprietà sono molteplici, proprio a seconda del tipo di frutta o verdura che si sceglie e di gran lunga migliori rispetto a quelle dei cibi cotti.
In sostanza i succhi freschi estratti da vegetali e frutta crudi sono il mezzo attraverso il quale possiamo rifornire tutte le cellule e i tessuti del nostro corpo, degli elementi e degli enzimi nutrizionali di cui necessitano, nel modo più semplice con cui poterli digerire.
A presto con nuove ricette! 😋 yumyum
RAINBOW JUICE EXPRESS
It has been so long since I had this project in mind and finally it’s time to share with you.
I have to thank my boyfriend, who gave me for my birthday the cold pressed juice extractor I wished for so long.
I’m very happy to share with you my personal rainbow of juices.
Five juices, with different colors and properties.
We know that fruit and veggies can be divided into five different categories of colors: red, purple-blue, orange, green and white.
Each of these colors indicate its own set of phytochemicals that have a big impact on our health.So, of course, more colorful will be our meal, the more abundant will be in precious elements! Fruits and vegetables with similar color contain similar nutritional benefits, but not all the nutrients can survive to cooking and which is why we must learn to consume them raw.
I can definitely confirm that the extractor is better than the centrifuge. The difference lies in the fact that the first slowly press the ingredients, while the second shredding more or less quickly the ingredients with the result of less juice and much waste.
If you own a centrifuge don’t worry, it works.
I used this one: Hotpoint Ariston juicer centrifuga a freddo
Don’t wait more and move the ranks of this rainbow introducing the first cold pressed juice: Yellow, with a decidedly tropical flavor.
This juice rich in vitamin A and C will be a great ally of our metabolism, thanks to the popular fat burning pineapple properties and tonic and energizing effect of coconut water.
PINA COLADA🍍
Ingredients | Approx. 400-500ml of juice
- 1/2 pineapple
- 1 cup coconut water (organic, sugar-free)
- 1-2 limes
- Ice
Method:
Peel the pineapple, coarsely chop it and put into the extractor.
Squeeze the lime, add the coconut water, stir, add ice and serve.
Yellow-orange fruits and veggies help prevent cancer, cardiovascular disease, cellular aging and enhancing the eyesight.
Orange is an energy-boost color, how can we do without it? 😉
The next juice remains on the warm tones of the rainbow, orange!
A juice from unusual ingredients, but definitely healthy.
It could be our elixir to face this season without influence.
Rich in vitamins and minerals, with anti-inflammatory, antimicrobial, detoxifying and digestive properties.
SUNBURST
Ingredients | Approx. 400-500ml of juice
- 2 oranges
- 1/2 large sweet potato
- 2 carrots
- 1 cm of fresh ginger
- 1 cm of fresh turmeric
- pinch of pepper
- Ice
Method:
Peel ginger, turmeric, and sweet potato.
Try to use organic ingredients, carrots should not be deprived of their skins.
Cut them coarsely and put into the extractor.
Squeeze the oranges, add to the extracted juice, add black pepper, ice and serve.
Black pepper helps to assimilate better the properties of turmeric
Fresh turmeric is not easy to find, but it keeps well in the fridge.
It comes as root, like ginger, but smaller and with orange flesh.
You can find it at the organic grocery market.
Now it is the turn of my favorite, the green one!
A mix of fruit and vegetables full of antioxidants, minerals and vitamins.
THE GREEN POWER 🍃
Ingredients | Approx. 400-500ml of juice
- 2 green apples
- 1 large cucumber
- 3-4 abundant handfuls of baby spinach (kale or any greens at your choice)
- 1 cm of fresh ginger
- 1 lemon
- Ice
Method:
Peel the cucumber and ginger. Coarsely chop the ingredients and put into the extractor, except lemon that will go squeezed apart.
Add the lemon juice, add the ice and enjoy!
The fourth of our juices is red, the color of passion.
Red fruits and vegetables stand out for their antioxidant properties and the ability to prevent cancers and cardiovascular diseases.
Red foods are also the richest in vitamin C: promote the production of collagen, keeping intact blood vessels, stimulate the immune system and helps to wound healings.
In short… a beauty elixir!
BEAUTY BEAST 💋
Ingredients | Approx. 400-500ml of juice
- 1 cup strawberries
- 2 large carrots
- 1 medium sized beetroot (raw)
- Juice of 1 grapefruit
- 1 teaspoon lemon juice (optional)
- Ice
Method:
Wash and coarsely chop the ingredients and put into the extractor, except grapefruit that will be squeezed apart.
Try to use organic ingredients, carrots should not be deprived of their skins.
Add the juice, ice and enjoy your elixir.
Our rainbow ends with the mysterious tones of purple …
A thick and sweet juice, but that will make us shine from inside.
It also could be fine for Halloween xD
THE NIGHT SHADOW 🍇
Ingredients | Approx. 400-500ml of juice
- 1 cup blackberries
- 2 sweet pears
- 1/4 large beetroot (raw)
- Juice of 1/2 lemon
- Ice
Method:
Wash and coarsely chop the ingredients and put into the extractor, except lemon that will be squeezed apart. Add the lemon juice, ice and serve.
These are just some of the thousands possible recipes that we can get by combining fruits and vegetables. I hope you’ll like them.
Leave a comment if you have an extractor or a centrifuge and let me know what are your favorite combinations of fruits and vegetables!
Cold pressed juices of fruit and veggies represent for the organism a real energy bomb. Their properties change depending on the type of fruit or vegetable you choose.
You’re eating raw, this means that their properties remain intact, while cooking they leave.
In essence, cold pressed juice are the instruments through which we can supply all the cells and tissues of our body, with elements and nutritional enzymes they need, in the easiest way to digest.
See you soon with new recipes! 😋 yum yum


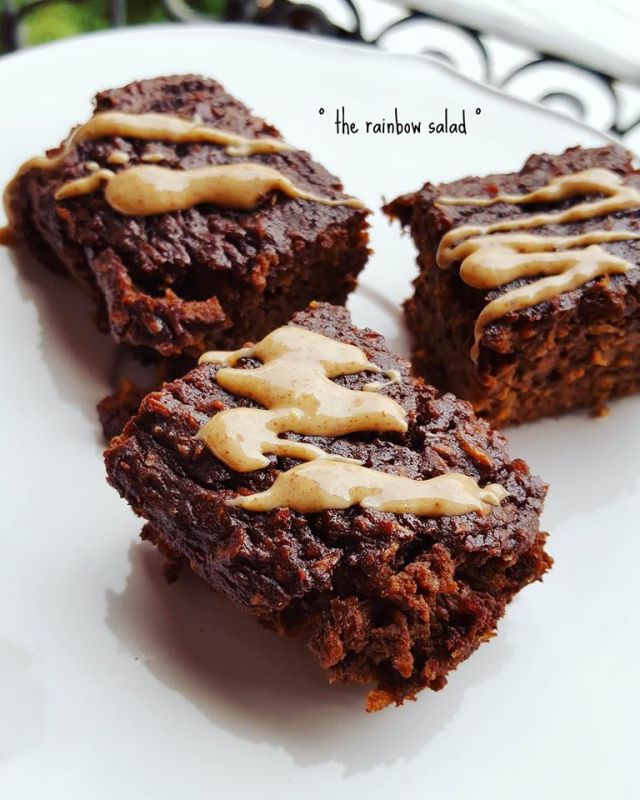
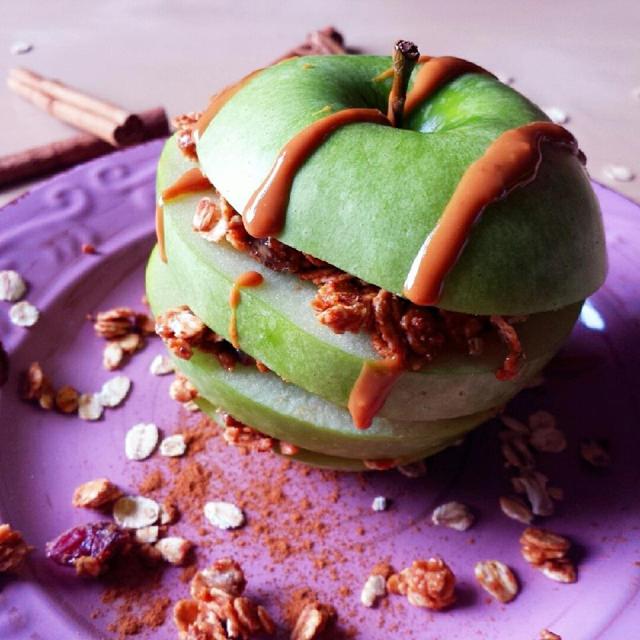
 La crusca è lo scarto che si ottiene dalla lavorazione dei vari cereali nel processo di raffinazione, ovvero nella separazione dalla farina. La crusca è quindi l’insieme degli involucri che racchiudono e proteggono i singoli semi dei cereali. Pochi sanno che la maggior parte dei nutrienti dei cereali è contenuta proprio in quegli involucri, che nelle farine raffinate vengono eliminati.